
前回の “sinatra で rails から外れた僕らは sinatra で i did it my way” の続き
今回は、mongodb を使って簡単な sinatra web アプリケーションをつくってみる。
また、bootstrap3 で簡単に見た目を綺麗にしてみる。
MongoDB を使うための準備
データの永続化をするために、ここでは mongodb を使う。別に sqlite3 や MySQL でも良かったがなんとなく NoSQLを選定。
まずは、こちらを参考に mongodb をインストールする。
1
2
3
4
5
6
7
8
| $ brew update
$ brew install mongodb
$ mongo --version
MongoDB shell version: 2.4.6
# mongod を起動する
$ /usr/local/bin/mongod --fork
all output going to: /usr/local/var/log/mongodb/mongo.log
|
mongodb を ruby から扱うための gem を bundler でインストールする。
Gemfile に mongo と bson_ext を追加する。(以下は Gemfile の diff 結果)
1
2
3
4
5
6
7
8
9
10
| diff --git a/Gemfile b/Gemfile
index 140fec0..74db599 100644
--- a/Gemfile
+++ b/Gemfile
@@ -6,3 +6,6 @@ gem "activerecord", "3.2.13"
gem "sqlite3", "1.3.7"
gem "sinatra", "1.4.3"
gem "sinatra-contrib", "1.4.0"
+gem "mongo"
+gem "bson_ext"
|
bundler でインストールする。
1
2
3
4
5
6
7
8
9
10
11
12
13
14
15
16
17
18
19
20
21
22
23
24
25
26
| $ bundle install --path vendor/bundle
Fetching gem metadata from https://rubygems.org/...........
Fetching gem metadata from https://rubygems.org/..
Resolving dependencies...
Using i18n (0.6.1)
Using multi_json (1.8.0)
Using activesupport (3.2.13)
Using builder (3.0.4)
Using activemodel (3.2.13)
Using arel (3.0.2)
Using tzinfo (0.3.37)
Using activerecord (3.2.13)
Using backports (3.3.4)
Installing bson (1.9.2)
Installing bson_ext (1.9.2)
Using eventmachine (1.0.3)
Installing mongo (1.9.2)
Using rack (1.5.2)
Using rack-protection (1.5.0)
Using rack-test (0.6.2)
Using tilt (1.4.1)
Using sinatra (1.4.3)
Using sinatra-contrib (1.4.0)
Using sqlite3 (1.3.7)
Using bundler (1.3.5)
Your bundle is complete!
|
ルーティング処理を追加する
まず、mongodb を ruby から扱うために require 'mongo' しておく。
before filter で mongodb とのコネクションを張っておく。
helper には、html エスケープ処理の alias を定義しておく。(のちほど views/index.erb で使う)
ブラウザから投稿”/new”と削除”/delete”の HTTP POST リクエストを受け付けるため、各ルーティング処理を追加している。
投稿では、mongodb への insert 処理を、削除では、mongodb からの remove 処理を記述している。
1
2
3
4
5
6
7
8
9
10
11
12
13
14
15
16
17
18
19
20
21
22
23
24
25
26
27
28
29
30
31
32
33
| require 'sinatra'
require 'sinatra/reloader'
require 'mongo'
# filter
before do
db_con = Mongo::Connection.new('localhost', 27017)
@db = db_con.db('sinatra_sample')
@comments = @db.collection('comments')
end
# helper
helpers do
# escape html
include Rack::Utils
alias_method :h, :escape_html
end
get '/' do
erb :index
end
post '/new' do
@comments.insert( :body => params[:body] )
redirect '/'
end
post '/delete' do
id = BSON::ObjectId( params[:id] )
@comments.find('_id' => id).each { |d_comment|
@comments.remove( d_comment )
}
end
|
フォームとか
フォームとかを作るため、views/index.erb を修正する。
<ul> ブロックで、mongodb からデータを抜いてきてリスト表示させている。
<form> ブロックで新規の投稿をする。/new に POST しているので、上記の post '/new' do ... end 部分の処理にルーティングされる。
<script> ブロックで jquery を利用して既存記事を削除する。Google APIを利用。
[x] をクリックしたときに、/delete に POST しているので、上記の post '/delete' do ... end 部分の処理にルーティングされる。
1
2
3
4
5
6
7
8
9
10
11
12
13
14
15
16
17
18
19
20
21
22
23
24
25
26
27
28
| <h1>sinatra sample</h1>
<ul>
<% @comments.find.each { |comment| %>
<li data-id="<%= comment["_id"]%>">
<%= h comment["body"] %>
<span class="deleteCmd" style="cursor:pointer; color:blue">[x]</span>
</li>
<% } %>
</ul>
<h2>Add new</h2>
<form method="post" action="new">
<input type="text" name="body"> <input type="submit" value="post">
</form>
<script src="https://ajax.googleapis.com/ajax/libs/jquery/1.10.2/jquery.min.js"></script>
<script>
$('.deleteCmd').click(function() {
var el = $( this ).parent();
if(confirm('are you sure to delete ?')) {
$.post('/delete', {
id: el.data('id')
}, function() {
el.fadeOut( 800 );
});
}
})
</script>
|
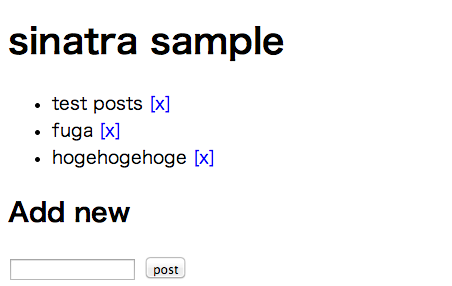
これで、mongodb を使った sinatra web アプリケーションができた。
ちょっと殺風景なので、twitter bootstrap3 を使ってお化粧する。
twitter bootstrap3 を使う
できあがったものがかなりそっけないので、CSS フレームワークである twitter bootstrap を使って、すこしだけおしゃれにする。
zip ファイル で配布されているので、ダウンロードして解凍する。
sinatra では静的ファイルを public/ 以下につっこむため、解凍したディレクトリを public にリネームして sinatra アプリを作っているワーキングディレクトリへ置いておく。
layout テンプレートの修正
bootstrap を使うため、views/layout.erb を以下のように修正する。
落としてきた css とscript を指定するのと、bootstrap を使う上で必須な jquery を指定している。
1
2
3
4
5
6
7
8
9
10
11
12
13
14
15
16
17
18
| <!DOCTYPE html>
<html lang="ja">
<head>
<meata charset="urf-8">
<title>sinatra test</title>
<meta name="viewport" content="width=device-width, initial-scale=1.0">
<link href="css/bootstrap.min.css" rel="stylesheet" media="screen">
</head>
<body>
<div class="container" syle="padding:20px 0">
<h1>Sinatra Sample</h1>
<%= yield %>
</div>
<script src="http://code.jquery.com/jquery.js"></script>
<script src="js/bootstrap.min.js"></script>
</body>
</html>
|
views/indx.erb も以下のように修正する。
<ul> をやめて、<table> へ。[x]という文字列も、削除アイコンへ修正。
1
2
3
4
5
6
7
8
9
10
11
12
13
14
15
16
17
18
19
20
21
22
23
24
25
26
27
28
29
30
31
32
33
34
35
36
37
| <table class="table table-striped">
<% @comments.find.each { |comment| %>
<tr data-id="<%= comment["_id"]%>">
<td>
<%= h comment["body"] %>
<span class="deleteCmd" style="cursor:pointer;">
<i class="glyphicon glyphicon-remove"></i>
</span>
</td>
</tr>
<% } %>
</table>
<h2>Add new</h2>
<form method="post" action="new">
<div class="form-group">
<label class="control-label" for="comment" >comment</label>
<input type="text" name="body" class="form-control" placeholder="your comment">
</div>
<div class="form-group">
<input type="submit" value="post" class="btn btn-primary">
</div>
</form>
<script src="https://ajax.googleapis.com/ajax/libs/jquery/1.10.2/jquery.min.js"></script>
<script>
$('.deleteCmd').click(function() {
var el = $( this ).parent().parent();
if(confirm('are you sure to delete ?')) {
$.post('/delete', {
id: el.data('id')
}, function() {
el.fadeOut( 800 );
});
}
})
</script>
|
これで、bundle exec ruby main.rb で sinatra を起動して http://localhost:4567/ にアクセスする。
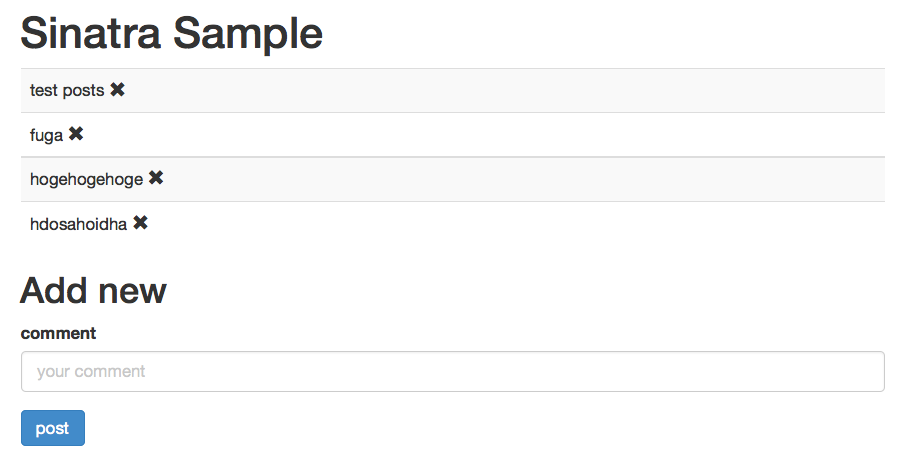
こんな感じでちょっとだけおしゃれになる。